Placeholder Content Image

Why and how often do I need to wash makeup brushes and sponges?

<p><em><a href="https://theconversation.com/profiles/enzo-palombo-249510">Enzo Palombo</a>, <a href="https://theconversation.com/institutions/swinburne-university-of-technology-767">Swinburne University of Technology</a> and <a href="https://theconversation.com/profiles/rosalie-hocking-1428271">Rosalie Hocking</a>, <a href="https://theconversation.com/institutions/swinburne-university-of-technology-767">Swinburne University of Technology</a></em></p> <p>From the bristles of brushes to the porous surfaces of sponges, your makeup kit can harbour a host of bacteria and fungi.</p> <p>These potentially hazardous contaminants can originate not only from the cosmetics themselves, but also from the very surface of our skin.</p> <p>So, how can we keep things hygienic and avoid microbial growth on makeup brushes and sponges? Here’s what you need to know.</p> <h2>How do germs and fungi get in my brushes and sponges?</h2> <p>Germs and fungi can make their way into your makeup kit in lots of ways.</p> <p>Ever flushed a toilet with the lid open with your makeup brushes nearby? There’s a good chance <a href="https://theconversation.com/mobile-phones-are-covered-in-germs-disinfecting-them-daily-could-help-stop-diseases-spreading-135318">faecal particles</a> have landed on them.</p> <p>Perhaps a family member or housemate has used your eyeshadow brush when you weren’t looking, and transferred some microbes across in the process.</p> <p>Bacteria that trigger a pimple outbreak can be easily transferred from the surface of your skin to a makeup brush or sponge.</p> <p>And tiny little mites called Demodex mites, which have been linked to certain rashes and acne, live on your skin, as well, and so may end up in your sponge or brushes.</p> <p>Bacterial contamination of <a href="https://pubmed.ncbi.nlm.nih.gov/38020232/">lip cosmetics</a>, in particular, can pose a risk of skin and eye infections (so keep that in mind if you use lip brushes). Lipsticks are frequently contaminated with bacteria such as <em>Staphylococcus aureus</em>, <em>E. coli</em>, and <em>Streptococcus pneumoniae</em>.</p> <p>Low-quality cosmetics are more likely to have higher and more diverse microbial growth compared to <a href="https://www.sciencedirect.com/science/article/pii/S1319562X23002978?pes=vor">high-quality cosmetics</a>.</p> <p>Brushes exposed to sensitive areas like the eyes, mouth and nose are particularly susceptible to being potential sources of infection.</p> <p>The range of conditions caused by these microorganisms includes:</p> <ul> <li> <p>abscesses</p> </li> <li> <p>skin and soft tissue infections</p> </li> <li> <p>skin lesions</p> </li> <li> <p>rashes</p> </li> <li> <p>and dermatitis.</p> </li> </ul> <p>In severe cases, infections can lead to invasion of the bloodstream or deep tissues.</p> <p>Commercially available cosmetics contain varying amounts and types of preservatives aimed at inhibiting the growth of fungi and bacteria.</p> <p>But when you apply makeup, different cosmetics with unique formulations of preservatives can become mixed. When a preservative meant for one product mixes with others, it might not work as well because they have different water amounts or pH levels.</p> <p>So preservatives are not foolproof. We also need to observe good hygiene practices when it comes to brushes and other cosmetics applicators.</p> <h2>Keeping brushes clean</h2> <p>Start with the basics: never <a href="https://www.semanticscholar.org/paper/Isolation-of-Pathogenic-Microbes-from-Beauty-Salons-Hassan-Hamad/0199635290628fe326fcd04a2b8a2422884a8240">share makeup brushes or sponges</a>. Everyone carries different microbes on their skin, so sharing brushes and sponges means you are also sharing germs and fungi.</p> <p>If you need to share makeup, use something disposable to apply it, or make sure any shared brushes are washed and sterilised before the next person uses it.</p> 
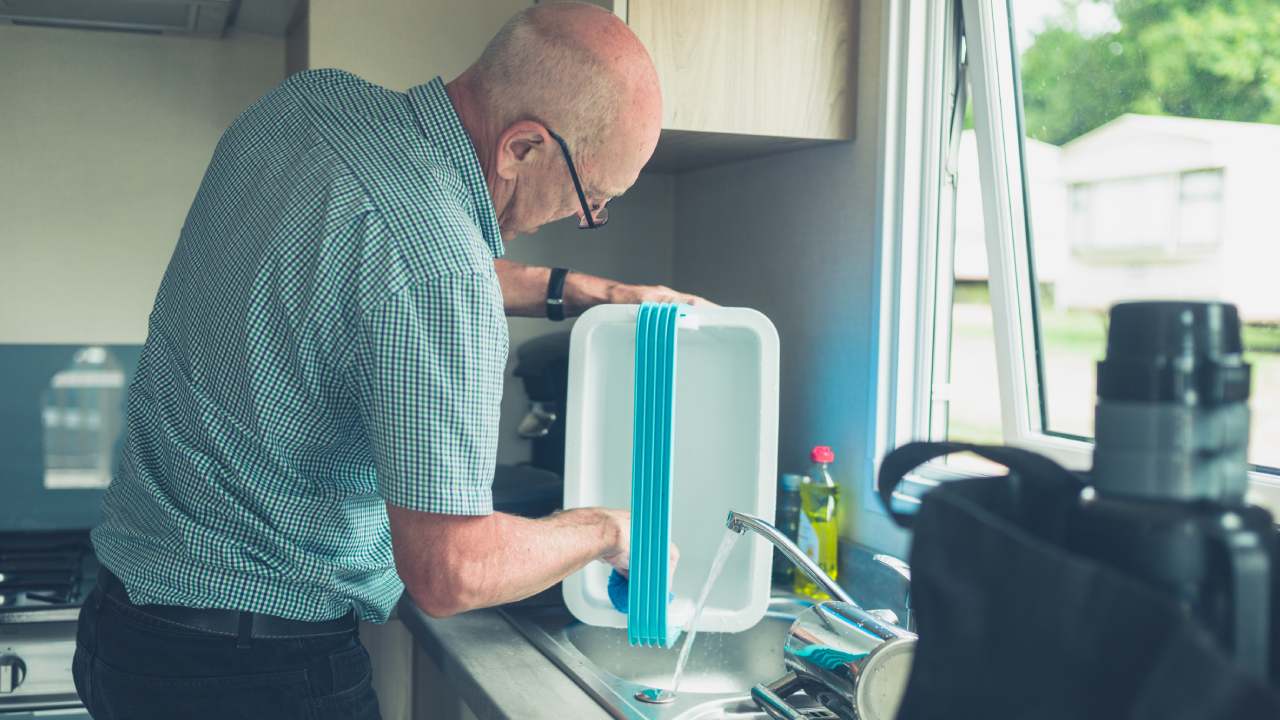
<p>Clean makeup brushes by washing with hot soapy water and rinsing thoroughly.</p> <p>How often? Stick to a cleaning routine you can repeat with consistency (as opposed to a deep clean that is done annually). <a href="https://www.aad.org/public/everyday-care/skin-care-secrets/routine/clean-your-makeup-brushes#:%7E:text=To%20protect%20your%20skin%20and,every%207%20to%2010%20days.">Once a week</a> might be a good goal for some, while others may need to wash more regularly if they are heavy users of makeup.</p> <p>Definitely wash straight away if someone else has used your brushes or sponges. And if you’ve had an eye infection such as conjunctivitis, ensure you clean applicators thoroughly after the infection has resolved.</p> <p>You can use bactericidal soap, 70% ethanol or chlorhexidine solutions to wash. Just make sure you wash very thoroughly with hot water after, as some of these things can irritate your skin. (While some people online say alcohol can degrade brushes and sponges, opinion seems to be mixed; in general, most disinfectants are unlikely to cause significant corrosion.)</p> <p>For some brushes, heating or steaming them and letting them dry may also be an effective sterilisation method once they are washed with detergent. Microwaving sponges isn’t a good idea because while the heat generated by a domestic microwave would kill microbes, it would need temperatures approaching 100°C for a decent period of time (at least several minutes). The heat could melt some parts of the sponge and hot materials could be a scalding hazard.</p> <p>Once clean, ensure brushes and sponges are stored in a dry place away from water sources (and not near an open toilet).</p> <p>If you’re having makeup applied professionally, brushes and applicators should be sterilised or changed from person to person.</p> <h2>Should I wash them with micellar water?</h2> <p>No.</p> <p>Not only is this expensive, it’s unnecessary. The same benefits can be achieved with cheaper detergents or alcohol (just rinse brushes carefully afterwards).</p> <p>Disinfection methods such as using bactericidal soap, 70% ethanol, or chlorhexidine are all very good at reducing the amount of microbes on your brushes and sponges.<!-- Below is The Conversation's page counter tag. Please DO NOT REMOVE. --><img style="border: none !important; box-shadow: none !important; margin: 0 !important; max-height: 1px !important; max-width: 1px !important; min-height: 1px !important; min-width: 1px !important; opacity: 0 !important; outline: none !important; padding: 0 !important;" src="https://counter.theconversation.com/content/220280/count.gif?distributor=republish-lightbox-basic" alt="The Conversation" width="1" height="1" /><!-- End of code. If you don't see any code above, please get new code from the Advanced tab after you click the republish button. The page counter does not collect any personal data. More info: https://theconversation.com/republishing-guidelines --></p> <p><a href="https://theconversation.com/profiles/enzo-palombo-249510"><em>Enzo Palombo</em></a><em>, Professor of Microbiology, <a href="https://theconversation.com/institutions/swinburne-university-of-technology-767">Swinburne University of Technology</a> and <a href="https://theconversation.com/profiles/rosalie-hocking-1428271">Rosalie Hocking</a>, <a href="https://theconversation.com/institutions/swinburne-university-of-technology-767">Swinburne University of Technology</a></em></p> <p><em>Image credits: Getty Images </em></p> <p><em>This article is republished from <a href="https://theconversation.com">The Conversation</a> under a Creative Commons license. Read the <a href="https://theconversation.com/why-and-how-often-do-i-need-to-wash-makeup-brushes-and-sponges-220280">original article</a>.</em></p>

Beauty & Style

Placeholder Content Image

Lemon curd and cream sponge cake

<p>Not only is this cake beautiful, but homemade lemon curd and cream sandwiched between lovely sponge cakes, it will exceed all expectations.</p> <p><strong><span style="text-decoration: underline;">Serves:</span> </strong>12</p> <p><strong><span style="text-decoration: underline;">Ingredients:</span></strong></p> <ul> <li>350g butter, softened, plus extra for greasing <ul> <li>350g caster sugar</li> <li>4 lemons, zest only, plus juice of 2 lemons</li> <li>3 large pieces candied lemon peel, finely chopped</li> <li>6 free-range eggs</li> <li>3 teaspoon baking powder</li> <li>300g self-raising flour</li> <li>50g cornflour</li> </ul> </li> </ul> <p><em>Lemon curd</em></p> <ul> <li>60g butter</li> <li>225g caster sugar</li> <li>3 lemons, juice and zest</li> <li>2 free-range eggs</li> </ul> <p><em>Cream</em></p> <ul> <li>300ml double cream</li> <li>200g icing sugar, sifted, plus extra for dusting</li> </ul> <p><strong><span style="text-decoration: underline;">Method:</span></strong></p> <p>1. Preheat the oven to 180°C. Grease and line two cake tins.</p> <p>2. In a bowl, cream the butter and sugar until pale and fluffy. Add the lemon zest and juice and candied peel.</p> <p>3. Slowly beat in the eggs, one at a time, until the mixture is well combined.</p> <p>4. Sift the baking powder, self-raising flour and corn flour together in a bowl and fold into the cake mixture.</p> <p>5. Divide the cake mixture evenly between the two cake tins and bake for 25 to 30 minutes or until risen and golden-brown. Remove from the oven and set aside to cool for 10 minutes. Run a round-bladed knife around the inside edge of the tins to loosen the cakes. Remove the cakes from the tins and set aside to cool completely on a rack.</p> <p>6. Meanwhile, to make the lemon curd heat the butter, sugar and lemon juice and zest in a bowl set over a pan of simmering water, stirring occasionally until the butter has melted and the sugar has dissolved. Be sure not allow the base of the bowl to touch the surface of the water. Remove from the heat.</p> <p>7. Meanwhile, beat the eggs in a separate bowl. Slowly whisk the melted butter mixture into the beaten eggs until well combined.</p> <p>8. Set the bowl over the pan of simmering water and cook, whisking constantly, for two to three minutes or until the mixture thickens enough to coat the back of a spoon.</p> <p>9. Sieve the lemon curd into a clean bowl, then cover with cling film and set aside to cool.</p> <p>10. For the cream, whip the cream and icing sugar together in a bowl until soft peaks form when the whisk is removed.</p> <p>11. Place one of the cakes onto a serving plate and spread with the lemon curd. Spread over some of the whipped cream and sandwich with another cake. Drizzle the top of cake with lemon curd and let it run over the edges.</p> <p><em>Images: Shutterstock</em></p>

Food & Wine

Placeholder Content Image

“They are truly disgusting”: Are you making this mistake while cleaning your kitchen?

<p>One university hygiene expert has warned the public that an item in your kitchen must be avoided at all costs.</p> <p>It’s a single rectangular sponge, and according to Professor Marylouise McLaws, who’s a germ and hygiene expert at the University of New South Wales, this item is “truly disgusting”.</p> <p>She told<span> </span><a rel="noopener" href="https://au.news.yahoo.com/what-the-dirtiest-item-in-your-kitchen-is-075647429.html" target="_blank">Yahoo News Australia</a><span> </span>that people should be more wary of the good old kitchen sponge.</p> <p>“They are truly disgusting. I recommend people don’t use them at all,” Professor McLaws said.</p> <p>“Those sponges are full of water and can contain bacteria that can cause an upset stomach. A small amount of that bacteria in the water can give it the perfect environment to breed in.”</p> <p>Professor McLaws said that a “perfect storm” for bacteria is when the sponge is taken to a kitchen bench that has already been contaminated by regular household items and their germs, such as from bags, animals, backpacks and other items from outside.</p> <p>“I dislike them intensely. They could be used on the floor, but should certainly never be used on dishes after that,” Professor McLaws said.</p> <p>Professor McLaws encourages people to use paper towels with soapy water or mild bleach spray instead of using bacteria-ridden sponges.</p> <p>“You have no idea if the cat has jumped up on it [the kitchen bench], and what kind of things are being brought in on the bottom of shopping bags,” she said.</p> <p>She also reminded people that they should clean “high-touch” areas.</p> <p>“These include places like the fridge handle, the dishwasher and other nobs and handles that are used frequently by multiple people,” she said.</p> <p>A warning is in place for the use of tea towels, as these are breeding grounds for bacteria as well.</p> <p>“Viruses and bacteria can just sit on tea towels. Households wanting to cut down on sick days should use a different towel for hands and dishes,” Professor McLaws said.</p> <p>However, towels in the bathroom are only usually used by one person and can be washed once a week.</p>

Home & Garden

Placeholder Content Image

Blueberry and cinnamon sponge cake

<p>“My Aunty Iris makes the best sponge cake I have ever eaten, and even though she has given me the recipe many times I still can’t make it as well as she does. She has a special touch! So here I’ve gone back to the drawing board and put my own twist on the classic sponge. This recipe is outstanding, with the perfect crumb – not too dry, not too moist – and all brought together with the delicious cinnamon cream and blueberry jam,” writes Justine Schofield in her latest cookbook<em> Simple Every Day.</em></p> <p><strong><span style="text-decoration: underline;">Serves</span>:</strong> 8</p> <p><strong><span style="text-decoration: underline;">Ingredients</span>:</strong></p> <ul> <li>4 eggs, at room temperature, separated</li> <li>zest of 1 lime</li> <li>¼ teaspoon cream of tartar</li> <li>145 g caster sugar</li> <li>125 g self-raising flour</li> <li>2 tablespoons vanilla custard powder</li> <li>pinch of ground cinnamon, plus extra to serve</li> <li>1 vanilla pod, split and seeds scraped</li> <li>3 tablespoons icing sugar, sifted</li> <li>250 ml thickened cream</li> <li>80 g sour cream</li> </ul> <p><strong><span style="text-decoration: underline;">Method</span>:</strong></p> <p>1. Preheat the oven to 160°C. Grease two 20 cm round cake tins and line the bases with baking paper.</p> <p>2. Combine the egg yolks and lime zest in a small bowl.</p> <p>3. Place the egg whites and cream of tartar in the bowl of an electric mixer and, using the whisk attachment, begin mixing on medium speed, gradually increasing the speed to high. Once the egg white is frothy, slowly rain in the caster sugar. Reduce the speed to medium and whisk for 5 minutes until the egg whites are thick and glossy. (Consistently whisking like this stabilises the foam.) Add the egg yolks and zest and mix for 30 seconds to combine. Sift in the flour and custard powder and lightly fold in with a spatula until  just combined.</p> <p>4. Divide the mixture between the prepared tins, smooth the surface, then tap lightly on the bench to eliminate any air pockets. Bake for 20–25 minutes until firm to touch and the top springs back gently when lightly pressed. Cool in the tins for 5 minutes, then gently loosen the cakes’ sides with the tip of small sharp knife and turn out onto a wire rack to cool completely.</p> <p>5. Meanwhile make the jam. Combine all the ingredients in a saucepan. Stir and leave to macerate for 5 minutes. Place over medium–high heat and cook, stirring, until the blueberry skins burst and the juices are released. Reduce the heat to low and cook for 20 minutes, skimming off any impurities that rise to the surface. Transfer the jam to a bowl and allow to cool.</p> <p>6. Combine the cinnamon, vanilla seeds, 1 tablespoon of the icing sugar and the cream in a bowl and whip to soft peaks. Add the sour cream and fold to combine.</p> <p>7. Spread the jam and then the cream over one of the sponge cakes. Place the other cake on top to sandwich the two layers together, then dust with the remaining icing sugar and an extra dash of cinnamon.</p> <p>Tip: If you want to make the jam ahead of time, spoon the hot jam into a sterilised 250 ml jar. Seal with a lid and turn the jar over for 2 minutes, then turn the right way up again. Set aside to cool. Homemade jam will keep for up to year if unopened. Once opened, place in the fridge and keep for up to 6 months.</p> <p><img width="140" height="183" src="https://oversixtydev.blob.core.windows.net/media/7265927/simpleeveryday_book-cover_140x183.jpg" alt="Simple Every Day _Book Cover (2)" style="float: right;"/></p> <p><em>Recipe courtesy of </em>Simple Every Day<em> by Justine Schofield (Plum, $39.99). </em></p>

Food & Wine

Placeholder Content Image

Why you shouldn’t throw out that old kitchen sponge just yet

<p>Of all the items hanging around your kitchen sink, the sponge may well be the most misunderstood. When you consider the surfaces these items are designed to clean, it’s understandable why many people are quick to buy new sponges on the first sign of mess. But with a bit of creativity, it’s possible to give an old sponge new life.</p> <p>Few people would relish the prospect of using a six-month-old sponge for tasks like cleaning your kitchen counter and cooking utensils, but your old kitchen sponge can have a second life as the perfect tool for those dirtier jobs.</p> <p><a href="https://www.nytimes.com/" target="_blank"><em><strong><span style="text-decoration: underline;">New York Times</span></strong></em></a> microbiologist Markus Egert advises savvy shoppers to hold on to their old sponges and transform them into the perfect tool to wipe down dirty spots around the house like windowsills, garbage bins and doors.</p> <p>A clever tip to make sure you don’t mix your sponge up with the cleaner ones in your arsenal is cutting a small tip of the corner off with a pair of scissors.</p> <p>And that’s just the start. <a href="https://www.thisoldhouse.com/" target="_blank"><strong><span style="text-decoration: underline;">This Old House</span></strong></a> has a range of tips on how to get creative with your old kitchen sponges, from putting one underneath a planter’s soil to retain water, to placing them at the bottom of furniture feet.</p> <p style="text-align: center;"><iframe width="560" height="315" src="https://www.youtube.com/embed/WM4KT4o2xq4" frameborder="0" allowfullscreen=""></iframe></p> <p>What are your thoughts? Do you generally discard old sponges?</p>

Money & Banking

Placeholder Content Image

The shocking truth about germs in your kitchen sponge

<p>Damp sponges, dish clothes and tea towels, are the ideal environment for germs to thrive. Research shows that illness-causing bacteria such as salmonella, E. coli and staphylococcus are found on 15 to 20 per cent of household sponges and cloths.</p> <p>Sponges are so germ-ridden that <a href="https://www.wsj.com/articles/how-often-should-i-replace-my-office-coffee-mug-1477928248" target="_blank"><strong><span style="text-decoration: underline;">experts have said</span></strong></a> it’s more hygienic not to clean your mug than wipe it with a kitchen sponge, if you are the only one who drinks from it.</p> <p>The main source of bacteria on your kitchen sponge is foods of animal origin. One study found salmonella on a chopping board that had been used to cut turkey 12 days prior.</p> <p>Milk, eggs, fruit and vegetables can also have bacteria present, although meat is the common cause.</p> <p>Dr Charles Gerba, a microbiologist from the University of Arizona explained why households are not constantly getting ill from using our kitchen sponges.</p> <p>“It’s a gamble — you have to get the right bacteria in the right food or on your hands, and the right bacteria have to be growing in the sponge at the time you use it,” Dr Gerba told Coach.</p> <p>“The goal is to keep the odds in your favour.”</p> <p>Getting sick from foodborne bacteria is still common and 80per cent of foodborne illness originate in the home from mishandling food.</p> <p><strong>How to clean your kitchen sponge</strong></p> <p>A <a href="https://www.ncbi.nlm.nih.gov/pubmed/25163762" target="_blank"><strong><span style="text-decoration: underline;">2014 study</span></strong></a> in Mexico found that the chance of contracting a foodborne illness is reduced a hundredfold by soaking sponges and dish cloths in bleach.</p> <p>The study observed 60 homes over six weeks with half of the households not changing their kitchen habits.</p> <p>The other group soaked sponges and cloths in bleach solution for five minutes and then let the dry on the counter, usually cleaning them twice a day.</p> <p>Dr Gerba explains other ways to sanitize your sponge that have the same impact as soaking it in bleach.</p> <p>“From research, the best options are using a disinfectant cleaner for the kitchen, washing the sponge in the dishwasher, or microwaving it damp for 30 seconds.”</p> <p><em><strong>To find your home essentials <a href="https://shop.oversixty.com.au/?utm_source=over60&amp;utm_campaign=Over60Shop&amp;utm_medium=in-article-link-o60shop&amp;utm_content=over60-shop" target="_blank"><span style="text-decoration: underline;">head to the Over60 Shop for high-quality offerings</span></a>.</strong></em></p> <p><a href="https://shop.oversixty.com.au/collections/living?utm_source=Over60&amp;utm_medium=in-article-banner-living&amp;utm_campaign=Over60Shop&amp;utm_content=over60-shop" target="_blank"><img src="http://media.oversixty.com.au/images/EditorialAddon/201706_Shopnow_EditorialAddon_468x60_Living.jpg" alt="Over60 Shop - Living Range"/></a></p>

Home & Garden

Placeholder Content Image

Spiced apple sponge

<p>As long as there are apples in the fruit bowl or fridge, you'll always have the makings of a dessert.</p> <p>There's apple crumble, apple sponge, apple dumplings, apple pie, baked stuffed apples, apple cobbler, Dutch apple cake.</p> <p>If you have some time on your side, a French apple tart with artistically arranged apple slices is always eye-catching.</p> <p>Depending on the dessert you are making, you may want to use apples that fluff up when they are cooked, or ones that retain their shape, sweet ones or tart ones.</p> <p><strong><span style="text-decoration: underline;">Ingredients:</span></strong></p> <p><em>For the fruit base</em></p> <ul> <li>800g apples</li> <li>2 cloves</li> <li>100g caster sugar</li> <li>Grated zest of 1 lemon</li> <li>¼ cup water</li> </ul> <p><em>For the sponge</em></p> <ul> <li>30g soft butter</li> <li>125g golden syrup</li> <li>2 eggs, well beaten</li> <li>150g self-raising flour</li> <li>1 tsp each ground ginger, mixed spice, cinnamon</li> <li>Pinch salt</li> </ul> <p><strong><span style="text-decoration: underline;">Method:</span></strong></p> <ol> <li>Peel and slice the apples and place in a pot with the cloves, caster sugar, lemon zest and water.</li> <li>Simmer until the apple softens, stirring to ensure it doesn't burn. Keep hot.</li> <li>For the sponge, place the golden syrup in a glass mixing bowl and warm it briefly in the microwave so it thins down a little – about 15 seconds will do. Don't let it get hot.</li> <li>Cream the butter and golden syrup then add the beaten eggs and mix until well combined.</li> <li>Stir in the sifted flour and spices and the salt.</li> <li>Place the hot apples in a pie dish and spoon over the sponge mix.</li> <li>Bake in a pre-heated 180C oven for 35 minutes.</li> <li>Serve with whipped cream, ice cream or thick yoghurt.</li> </ol> <p><em>Written by Pat Churchill. First appeared on <a href="http://www.stuff.co.nz/" target="_blank"><strong><span style="text-decoration: underline;">Stuff.co.nz</span></strong></a>.</em></p> <p><em><strong>Have you ordered your copy of the Over60 cookbook, The Way Mum Made It, yet? Featuring 175 delicious tried-and-true recipes from you, the Over60 community, and your favourites that have appeared on the Over60 website, <span style="text-decoration: underline;"><a href="https://shop.abc.net.au/products/way-mum-made-it-pbk" target="_blank">head to the abcshop.com.au to order your copy now</a></span>.</strong></em></p>

Food & Wine

Our Partners