Placeholder Content Image

13 homemade weed killers that work

<p>Don’t want to use chemicals on your garden? You don't have to! Mix up these handy helpers in the kitchen.</p> <p><strong>1. Boiling water</strong></p> <p>Homemade treatments don’t come much cheaper than this. Put the kettle on, boil a pot of water and then pour it straight over the weeds – just make sure to avoid any surrounding plants. This works especially for small weed coming up through the cracks in pavement or in brickwork.</p> <p><strong>2. White vinegar</strong></p> <p>Is there anything white vinegar can’t do? You can use regular old kitchen vinegar or get the heavy duty stuff from gardening stores. Spray directly onto the leaves of the weeds and watch them fade away.</p> <p><strong>3. Salt</strong></p> <p>Another kitchen staple that can do double duty in the garden. You can either sprinkle rock salt or basic table salt directly around garden beds where weeds usually appear or create a 3:1 solution of water and salt to spray onto the leaves.</p> <p><strong>4. Salt &amp; vinegar</strong></p> <p>Combine the two and you’ll get even better results! Mix a cup of table salt with a litre of vinegar, then brush directly onto the leaves of the weeds. It’ll kill anything it touches, so avoid other plants.</p> <p><strong>5. Vegetable oil</strong></p> <p>For bulbous weeds, like onion weed and oxalis, you can inject vegetable oil into the ground surrounding the bulbs. The oil will coat the bulbs so they suffocate and will then rot into the soil.</p> <p><strong>6. Cornmeal</strong></p> <p>This won't kill existing weeds but is great for preventing them from sprouting in the first place. Cornmeal is a pre-emergent, meaning it stops seeds from growing, so it’s best for using around established plants.</p> <p><strong>7. Clove or citrus oil</strong></p> <p>Mix 15 to 20 drops of clove or citrus oil with a litre of water and spray or brush directly onto the leaves. This works best on small, actively growing seedlings rather than more established weeds.</p> <p><strong>8. Rubbing alcohol</strong></p> <p>Grab that bottle of rubbing alcohol out of the bathroom cabinet and mix two tablespoons with a litre of water. Pour it into a spray bottle and spray directly onto the weeds. The alcohol removes moisture so the weeds will quickly dry out and die.</p> <p><strong>9. Baking soda</strong></p> <p>Baking soda is sodium bicarbonate (essentially a salt), so increases the salinity of the ground to a point where the weeds cannot survive. Use around a teaspoon per weed to cover the entire plant, especially the stem. It’s also great for weeds in cracks.</p> <p><strong>10. Bleach</strong></p> <p>This one couldn’t be simpler. Pour undiluted bleach straight over the top of mature weeds at the hottest part of the day, then let the sun do its work. You should be able to pull the dead weeds out the next day. Plus the bleach stays in the soil and prevents new growth.</p> <p><strong>11. Newspaper</strong></p> <p>Rather than killing the weeds, you can smother them with leftover newspaper. Lay down at least four sheets (though the thicker the better) and the lack of sun means the weeds won’t be able to sprout.</p> <p><strong>12. Mulch</strong></p> <p>Another one from the smothering camp, a good layer of mulch will keep your soil moist, healthy and weed-free. It also blocks out the sunshine weeds need to grow while leaving the surrounding plants untouched.</p> <p><strong>Elbow grease</strong></p> <p>Ok, so this isn’t actually something you put on the weeds, but it’s all you really need to get rid of most of them. Roll up your sleeves, put on some gloves and get pulling. Make sure you get the roots so they don’t grow straight back.</p> <p><em>Image: Unsplash / Josue Michel</em></p>

Home & Garden

Placeholder Content Image

Crumbed Lamb Cutlets with Vegemite

<p>Jazz up your lamb cutlets this Xmas with these simple yet delicious homemade breadcrumbs and my secret ingredient; vegemite, which takes the overall flavour to the next level!</p> <p>Whenever we have family or friends visiting, I turn to making lamb cutlets as they’re easy to cook with, taste delicious and my go-to little hack to help them go further is by crumbing them. I know it can be so easy to resort to pre-made or panko breadcrumbs but these homemade breadcrumbs are truly worth it. But what makes this recipe extra special is the use of vegemite. I know that may sound weird but let me put it this way for you… you would pair lamb with anchovy so why not vegemite? It’s a great anchovy replacement and has a rich depth of umami flavour that is perfectly paired with lamb. </p> <p>You can also cook these lamb cutlets three different ways: in the oven, airfryer or my favourite way, shallow fried in extra virgin olive oil – AND the best part, they take 15 mins max to prep and cook. Something we all need when welcoming family members round.</p> <p>Makes 10 - 12 cutlets Serves 4</p> <p><strong>Ingredients</strong></p> <p>Raddico, Watercress and Feta salad</p> <p>● 1 raddico</p> <p>● 1 bunch watercress</p> <p>● 2 cups peas</p> <p>● 100g feta</p> <p><span style="text-decoration: underline;">Lemon Honey Dressing</span></p> <p>● ½ cup olive oil</p> <p>● 2 tablespoons honey</p> <p>● ¼ cup lemon juice</p> <p>● 1 garlic clove finely sliced</p> <p>● Zest from 2 lemons</p> <p>● Salt and pepper</p> <p><span style="text-decoration: underline;">Vegemite toast crumb lamb cutlets</span></p> <p>● 10 - 12 lamb cutlets</p> <p>● 6 slices of white sandwich loaf</p> <p>● 1 tablespoons vegemite</p> <p>● 2 eggs</p> <p>● 1 garlic clove crushed</p> <p>● 1/2 cup flour</p> <p>● 1 teaspoon salt</p> <p>● 1 teaspoon cracked black pepper</p> <p>● ½ bunch fresh parsley roughly chopped and stalks discarded</p> <p>● ½ tablespoon fresh rosemary roughly chopped</p> <p>● Extra Virgin Olive oil</p> <p>Method -</p> <p>Raddico, Watercress and Feta salad</p> <p>1. Combine all ingredients into a large bowl. For the dressing, combine all ingredients into</p> <p>a jar and shake well. Dress the salad and sprinkle with feta.</p> <p>Vegemite toast crumb lamb cutlets</p> <p>1. Lay the bread out onto a baking tray and leave it to dry out overnight. It’s important your</p> <p>bread has been dried out as this will give you the crispiest breadcrumbs.</p> <p>2. In a shallow wide bowl, whisk your eggs and garlic together.</p> <p>3. Place several lamb cutlets at a time between two pieces of baking paper. Using the smooth side of a mallet pound the cutlets, until roughly 2cm thick throughout. This step is to ensure the lamb cooks at an even rate.</p> <p>4. Spread the vegemite onto one side of the bread. Roughly tear apart your bread and</p> <p>place into a food processor with the parsley and rosemary. Blend until the bread is</p> <p>chunky and the herbs have been mixed through. Place your breadcrumbs into a bowl.</p> <p>5. In a shallow bowl, whisk together the flour, salt and pepper. Begin with your flour, followed by the egg wash, breadcrumbs and finish with a large clean plate to place the cutlets. Take one lamb cutlet and coat both sides evenly with the flour, place into the egg wash, coat both sides evenly. Lastly, place into the breadcrumb mixture applying pressure with your hands when you flip the lamb over to ensure the breadcrumbs are evenly coated all over. Set aside and repeat with the remainder of the cutlets. Place the lamb into the fridge for 30 - 60 minutes to allow the breadcrumbs to set and bring the meat to a cold temperature.</p> <p>6. In a large frying pan, add 2 - 3cm of olive oil and bring to heat. Turn the heat down to low- medium and fry 1 - 2 pieces of lamb at a time for 3 minutes on one side and then 2.5 minutes on the other or until they are golden and crispy. Place the lamb cutlet onto a cooling rack.</p> <p>7. Enjoy with the raddico, watercress and feta salad.</p> <p><em>Image: Supplied</em></p>

Food & Wine

Placeholder Content Image

Homemade snack eaten by the Queen every day for over nine decades

<p dir="ltr">A former royal chef has revealed that Queen Elizabeth II has been eating one particular snack ever since she was first served it as a child in the royal nursery.</p> <p dir="ltr">Darren McGrady worked for the royal family for almost two decades according to <em>The Sun</em>, and has since revealed some of the Queen’s favourite dishes and frequent requests, including one known as Jam Pennies.</p> <p dir="ltr">McGrady described Jam Pennies as a simple sandwich of “bread and jam with a little butter - usually strawberry jam”, and said the Queen has been eating them every day for 91 years.</p> <p dir="ltr">“We’d make the jam at Balmoral Castle with the gorgeous Scottish strawberries from the gardens,” he said.</p> <p dir="ltr">Meanwhile, another former royal chef has said the Queen is partial to a tuna and mayonnaise sandwich, a popular combination among Brits, but with her own twist.</p> <p dir="ltr">Owen Hodgson told the <em>Telegraph </em>that the monarch prefers hers well-buttered with cucumbers and pepper.</p> <p dir="ltr">Aside from sandwiches, McGrady has shared more insights into Her Majesty’s dining habits, including her insistence on having afternoon tea no matter where in the world she happens to be.</p> <p dir="ltr">The chef recalled one particular instance when he flew to Australia and settled aboard a royal yacht at 5am local time, which was five in the afternoon for the Queen - meaning his first task was to make scones.</p> <p dir="ltr">“In terms of scones - one day plain and one day with raisins folded through,” he said of the Queen’s usual afternoon tea spread.</p> <p dir="ltr">“Also, tiny pastries like raspberry tartlets and a cut cake, honey and cream sponge, fruit cake, banana bread, or her favourite chocolate biscuit cake.</p> <p><span id="docs-internal-guid-173e3f25-7fff-7124-bfda-aae4a4b6d2c9"></span></p> <p dir="ltr">“It would all be washed down with a delightful steaming hot cup of Earl Grey tea.”</p> <p dir="ltr"><em>Image: Getty Images</em></p>

Food & Wine

Placeholder Content Image

Homemade cookies for your pup

<p dir="ltr">Many Aussies are turning to their own kitchens for pet food, with 29% of owners admitting to cooking or making home-made treats for their cats or dogs.</p> <p dir="ltr">While creating bark-uterie boards and pup-cakes continue to grow in popularity, it’s important that owners continue to maintain a balanced and healthy diet for their pet, even when they treat them to a home-made meal!</p> <p dir="ltr">Recipe courtesty of Petstock.</p> <h4 dir="ltr">Dog cookie recipe</h4> <h4 dir="ltr">Ingredients</h4> <ul> <li dir="ltr" aria-level="1"> <p dir="ltr" role="presentation">½ cup wheat flour</p> </li> <li dir="ltr" aria-level="1"> <p dir="ltr" role="presentation">½ cup coconut flour</p> </li> <li dir="ltr" aria-level="1"> <p dir="ltr" role="presentation">2 tablespoons melted coconut oil</p> </li> <li dir="ltr" aria-level="1"> <p dir="ltr" role="presentation">2 eggs</p> </li> <li dir="ltr" aria-level="1"> <p dir="ltr" role="presentation">¾ cup blueberries (optional, halved)</p> </li> </ul> <h3 dir="ltr">Method</h3> <ol> <li dir="ltr" aria-level="1"> <p dir="ltr" role="presentation">Combine flour into mixing bowl</p> </li> <li dir="ltr" aria-level="1"> <p dir="ltr" role="presentation">Add in coconut oil</p> </li> <li dir="ltr" aria-level="1"> <p dir="ltr" role="presentation">Add in eggs</p> </li> <li dir="ltr" aria-level="1"> <p dir="ltr" role="presentation">Combine blueberries</p> </li> <li dir="ltr" aria-level="1"> <p dir="ltr" role="presentation">Roll dough into fist sized balls before rolling dough out onto floured surface</p> </li> <li dir="ltr" aria-level="1"> <p dir="ltr" role="presentation">Cut out cookie dough with doggie cookie cutters</p> </li> <li dir="ltr" aria-level="1"> <p dir="ltr" role="presentation">Place on a baking paper lined oven tray</p> </li> <li dir="ltr" aria-level="1"> <p dir="ltr" role="presentation">Bake for 20 minutes or until golden brown</p> </li> </ol> <p dir="ltr"><strong>Tips:</strong></p> <ul> <li dir="ltr" aria-level="1"> <p dir="ltr" role="presentation">Coconut flour is highly absorbent and can be difficult to work with and roll out, so use plenty of flour on your working surface and rolling pin.</p> </li> <li dir="ltr" aria-level="1"> <p dir="ltr" role="presentation">For grain-free pets, you can use coconut flour only, however you will need to increase the liquids used and add slowly to get the desirable consistency.</p> </li> <li dir="ltr" aria-level="1"> <p dir="ltr" role="presentation">Reduce your baking time slightly to create soft doughy cookies, or lengthen baking time for a crunchier treat.</p> </li> </ul> <p><em>Image: Better Homes &amp; Gardens</em></p> <p> </p>

Family & Pets

Placeholder Content Image

From a series of recipes by Xali: Homemade sushi

<p dir="ltr">This is a great meal to get the family involved. Prepare the ingredients and paté ahead of time and get ready for some hands-on fun! Pecans provide an abundance of organic pyridoxine (vitamin B6), essential for serotonin release and nervous-system health. </p> <p dir="ltr"><strong>Serves: </strong>3</p> <p dir="ltr"><strong>Prep:</strong> 30 mins</p> <p dir="ltr"><strong>Ingredients:</strong></p> <p dir="ltr">Nori seaweed, sheet - 3 whole</p> <p dir="ltr">Sprouts, assorted - 1/2 cup</p> <p dir="ltr">Cucumber julienned - 1/8 whole</p> <p dir="ltr">Avocado sliced - 1/8 whole</p> <p dir="ltr">Tamari to serve - 1/8 cup</p> <p dir="ltr">For the paté Pecans - 3/4 cup</p> <p dir="ltr">Capsicum, red chopped - 1/2 whole</p> <p dir="ltr">Spring onion chopped - 1 1/2 whole</p> <p dir="ltr">Coriander, fresh chopped - 1/8 cup</p> <p dir="ltr">Chilli flakes - 1/8 tsp</p> <p dir="ltr">Salt - 1/8 tsp</p> <p dir="ltr">Cracked black pepper - 1/8 tsp</p> <p dir="ltr"><strong>Method: </strong>For the paté</p> <p dir="ltr">1. Add pecans to the food processor and blitz until they are reduced to a medium crumb. Add the remaining filling ingredients and blend to a chunky pate. Do not over process.</p> <p dir="ltr"><strong>To make 6 rolls</strong></p> <p dir="ltr">2. Place nori sheet with ribbed-side facing upwards, shiny side facing down, and lines in nori perpendicular to you.</p> <p dir="ltr">3. Spread the paté evenly over the sheet leaving the edge furthest away from you free from paté for roughly 1cm as you will use this to secure the roll. Make sure to cover each horizontal edge or you might end up with end pieces without much filling.</p> <p dir="ltr">4. Lay vegetables horizontally in the lower half of the sheet. Start rolling with the edge closest to you. Roll tightly, yet gently away from you. Secure the roll by adding a bit of water to the free edge furthest from you.</p> <p dir="ltr">5. With a sharp knife, cut the roll in half. Slice each half into three or four bite-sized piece.</p> <p><span id="docs-internal-guid-cdcc3960-7fff-ca94-990a-86f7f8a6eda1"></span></p> <p dir="ltr">6. Repeat the process for the remaining ingredients. Slice into rounds and serve with a side of tamari.</p> <p dir="ltr"><em>Image: Supplied</em></p>

Food & Wine

Placeholder Content Image

How I mastered baking a yeast bread from scratch, and saved money doing it

<p><span style="font-weight: 400;">By Jeanne Sidner</span></p> <p><span style="font-weight: 400;">My introduction to baking started with the home-kitchen classic that cracks open the oven door for so many – chocolate chip cookies. It was the 1970s, and most of the mums in our largely Catholic neighbourhood were busy raising big families. For the girls in my house, that meant our mother made sure we knew our way around the kitchen. At the flour-dusted table, Mum taught eight-year-old me how to make the cookies perfectly chewy with a crispy exterior. (The big secret: Always chill your dough.)</span></p> <p><span style="font-weight: 400;">So from a young age, I was crystal clear on the power of a baked-to-perfection cookie to make people happy. Baking cookies – then brownies, cakes and pies – became my hobby and a tasty form of social currency. First I used my skills with butter and sugar to impress a series of teenage boyfriends. In time, the fresh goodies were left on doorsteps to welcome new neighbours and set out in the break room for co-workers. Baking was my superpower.</span></p> <p><span style="font-weight: 400;">A few years ago, I became the content director for Taste of Home, Reader’s Digest’s sister magazine and website that celebrates the treasured recipes of home cooks. I’d never been more excited for a new job, but privately I worried that my baking chops wouldn’t measure up. Why? I had a secret as dark as an oven with a burned-out light bulb: While I had baked sweets my whole life, I’d never made a yeast bread from scratch.</span></p> <p><span style="font-weight: 400;">Still, this was no time for excuses. I was a baker, now one with Taste of Home attached to my name. I may have been intimidated by bread, but it was time. I wanted in.</span></p> <p><span style="font-weight: 400;">Getting started, I found Instagram to be a friend. A basic no-knead bread was the one I was seeing online overlaid with dreamy filters. People described it as easy, and to be honest, the thought of removing even one intimidating variable – kneading – was enough to get me to buy two kilograms of bread flour and dive in.</span></p> 
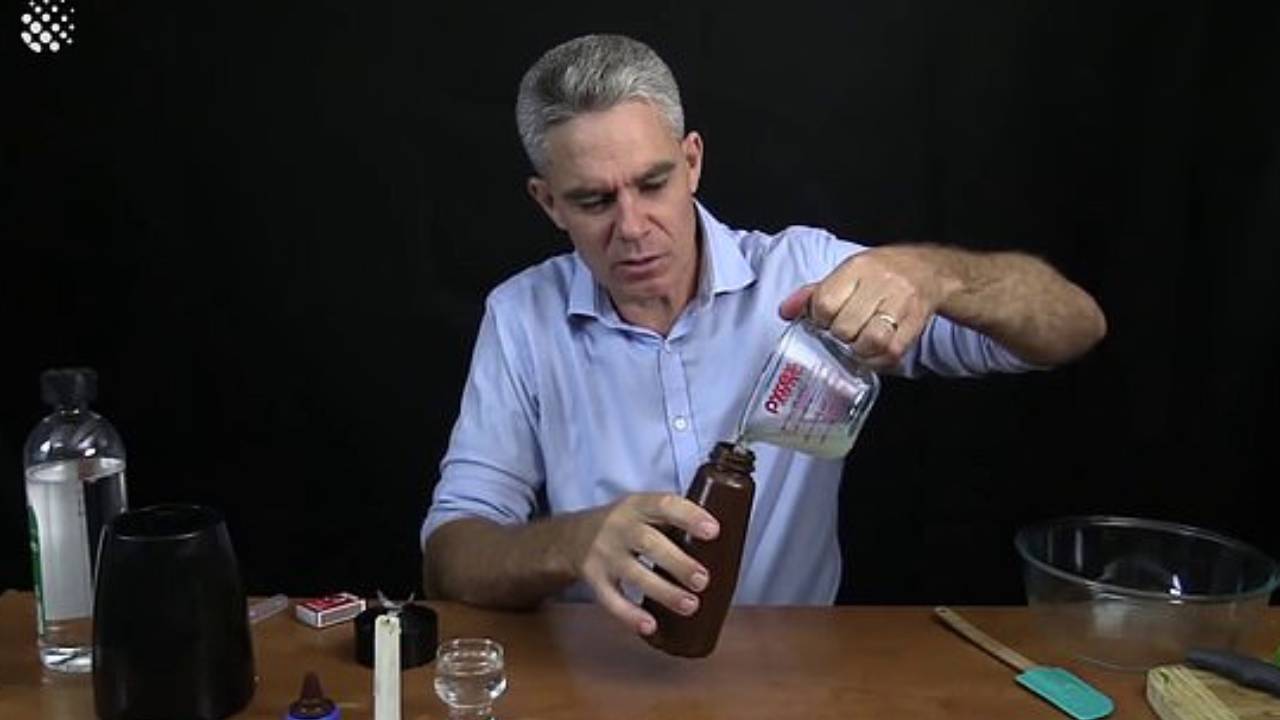
<p><span style="font-weight: 400;">I gathered everything I’d need (“be prepared” is the first rule of any baking), including my mum’s trusty Pyrex. It had seen me through my first days as a baker, so I was counting on it to work its magic. I had an easy Taste of Home recipe all set on my iPad. I mixed the flour, salt, and yeast and made sure the water temperature was just right – 38 to 46 degrees – before pouring it in.</span></p> <p><span style="font-weight: 400;">And then it happened – or didn’t happen. I followed the instructions to the letter, but my dough didn’t rise. Somehow, impossibly, it looked smaller. Sludgy, gooey, wet with a few bubbles. Sad.</span></p> <p><span style="font-weight: 400;">Three hours later, after I’d resisted the urge to keep checking on it like a nervous mum with a newborn, a puffy dough filled the bowl. I hadn’t killed it; it was just … sleeping. A quick fold, a second rise, and then my bread went into my Dutch oven and off to bake.</span></p> 
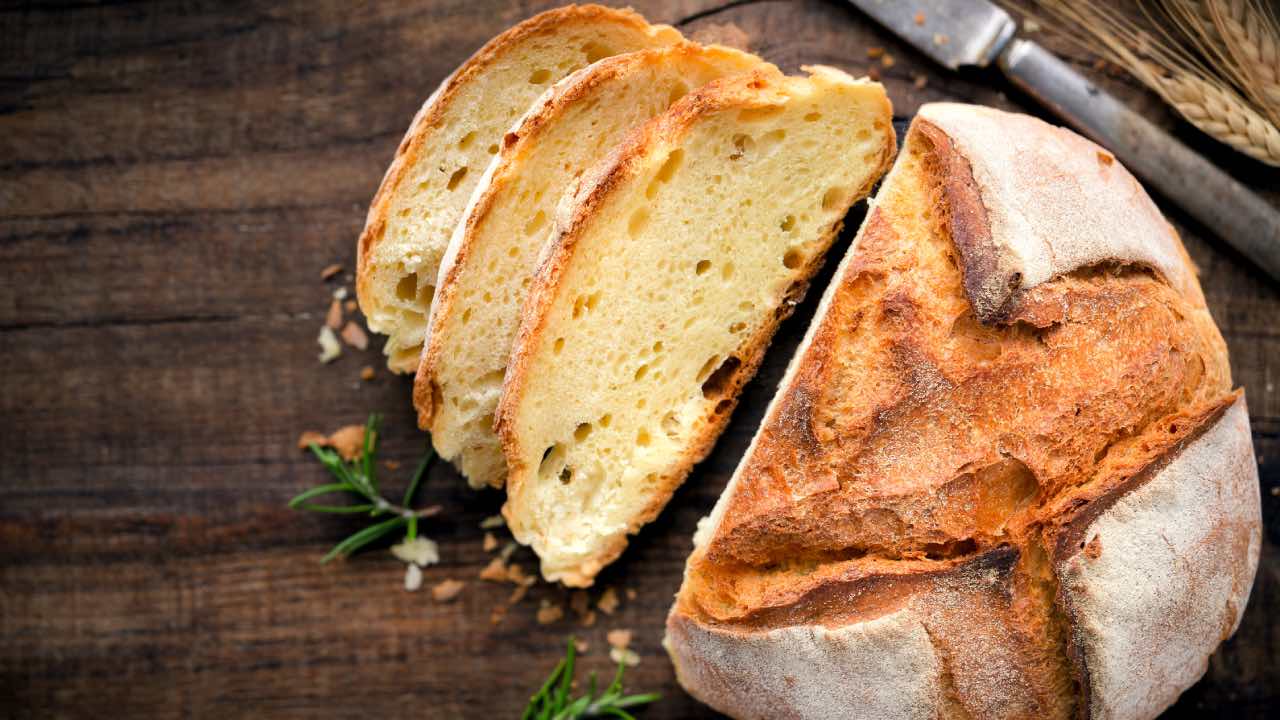
<p><span style="font-weight: 400;">Thirty minutes later, I took it out. Sure, it was slightly misshapen, but in my eyes, it was golden-brown, crusty perfection, right down to the yeasty-sweet hit of steam coming from its top.</span></p> <p><span style="font-weight: 400;">Naturally, the first thing I did was grab my phone and hop on Instagram, positioning my beautiful bread just so in a shining stream of daylight on a wooden cutting board. No one needed to know it was my first yeast bread ever – or how close it came to getting scraped into the garbage can. The online reactions started almost immediately – heart emojis and comments like “This looks DELISH!” from my friends.</span></p> <p><span style="font-weight: 400;">Finally I cut into that lovely brown crust and doled out slices to my husband and kids. Those slices led to seconds, then thirds, each piece slathered with softened butter and a little sprinkle of salt. I made my family perhaps happier with slices of warm, buttered homemade bread than I had with all the sweets combined. </span></p> <p><span style="font-weight: 400;">At last, I was a bread baker – despite yeast’s best attempts to intimidate me on this first try. No more feeling inferior or afraid. Now I make bread and homemade pizza crust regularly. And I have enough confidence to start thinking (and stressing!) about my next difficult baking challenge: homemade croissants.</span></p> <p><em>Image credit: Shutterstock</em></p> <p><em>This article first appeared in <a rel="noopener" href="https://www.readersdigest.com.au/food-home-garden/home-tips/how-i-mastered-baking-a-yeast-bread-from-scratch-after-years-of-failure" target="_blank" title="Mastering yeast bread">Reader’s Digest</a>. </em></p>

Retirement Income

Placeholder Content Image

Jamie Oliver to the rescue with easy homemade bread recipe

<div class="post_body_wrapper"> <div class="post_body"> <div class="body_text "> <p>Jamie Oliver has impressed fans with an easy guide on how to make homemade bread with just three ingredients in his new cooking show ‘Keep Cooking and Carry On’.</p> <p>The new series aims to help viewers during the coronavirus pandemic by offering easy recipes and cooking tips on items usually found in a person’s cupboard.</p> <p>The first episode was met with praise, as viewers called it “Helpful, resourceful and creative” as many people struggle to find basics in their local supermarket due to panic buying from the coronavirus pandemic.</p> <p>Oliver, 44, revealed how you can make bread in just two hours using water, yeast and flour as shoppers are struggling to find any in supermarkets.</p> <blockquote style="background: #FFF; border: 0; border-radius: 3px; box-shadow: 0 0 1px 0 rgba(0,0,0,0.5),0 1px 10px 0 rgba(0,0,0,0.15); margin: 1px; max-width: 540px; min-width: 326px; padding: 0; width: calc(100% - 2px);" class="instagram-media" data-instgrm-permalink="https://www.instagram.com/p/B-IDQi8FSO6/?utm_source=ig_embed&amp;utm_campaign=loading" data-instgrm-version="12"> <div style="padding: 16px;"> <div style="display: flex; flex-direction: row; align-items: center;"> <div style="background-color: #f4f4f4; border-radius: 50%; flex-grow: 0; height: 40px; margin-right: 14px; width: 40px;"></div> <div style="display: flex; flex-direction: column; flex-grow: 1; justify-content: center;"> <div style="background-color: #f4f4f4; border-radius: 4px; flex-grow: 0; height: 14px; margin-bottom: 6px; width: 100px;"></div> <div style="background-color: #f4f4f4; border-radius: 4px; flex-grow: 0; height: 14px; width: 60px;"></div> </div> </div> <div style="padding: 19% 0;"></div> <div style="display: block; height: 50px; margin: 0 auto 12px; width: 50px;"></div> <div style="padding-top: 8px;"> <div style="color: #3897f0; font-family: Arial,sans-serif; font-size: 14px; font-style: normal; font-weight: 550; line-height: 18px;">View this post on Instagram</div> </div> <p style="color: #c9c8cd; font-family: Arial,sans-serif; font-size: 14px; line-height: 17px; margin-bottom: 0; margin-top: 8px; overflow: hidden; padding: 8px 0 7px; text-align: center; text-overflow: ellipsis; white-space: nowrap;"><a style="color: #c9c8cd; font-family: Arial,sans-serif; font-size: 14px; font-style: normal; font-weight: normal; line-height: 17px; text-decoration: none;" rel="noopener" href="https://www.instagram.com/p/B-IDQi8FSO6/?utm_source=ig_embed&amp;utm_campaign=loading" target="_blank">A post shared by Jamie Oliver (@jamieoliver)</a> on Mar 24, 2020 at 11:05am PDT</p> </div> </blockquote> <p>“Cooking can be good for the soul and making bread is such a rewarding, therapeutic, tactile thing – you’ll be so proud of yourself when you’ve cracked it,” Oliver says on his<span> </span><a rel="noopener noreferrer" href="https://www.jamieoliver.com/recipes/bread-recipes/easy-homemade-bread/" target="_blank">recipe to make the bread</a>.</p> <p>From one simple bread recipe like this, there’s a million things you can do – big ones, small ones, in a tin, on a tray, get creative. There are also loads of lovely flours you can experiment with – wholewheat, rye, spelt, using a blend of a couple of different ones. Plus, making bread is a great thing to do with the kids – they'll love it. ”</p> <p>Fans on Twitter were quick to praise Oliver for being innovative in times of crisis.</p> <p>“Can I just say a huge thank you Mr Oliver. I was feeling somewhat overwhelmed, low in energy and unenthused about cooking and your recipes perked me up and for a brief moment I felt the stress slip away, plus some yummy food! I for one really appreciate your help x”</p> <p>“Cooking nutritious meals for yourself and your loved ones has never been more important,” Oliver said in a statement for the show.</p> </div> </div> </div>

Food & Wine

Placeholder Content Image

Science teacher reveals how to make homemade hand sanitiser with only two ingredients

<p>A science teacher has revealed how to make hand sanitiser in a sauce bottle as people struggle to find stock during the coronavirus outbreak.</p> <p>As the outbreak continues, supermarket shelves have been stripped of everyday essentials such as hand sanitiser and toilet paper.</p> <p>Australian science teacher and YouTuber Jacob Strickling showed how people at home can make their own hand sanitiser in a sauce bottle.</p> <p>“Now it [the sanitiser] has to be alcoholic based and it needs to be a minimum of 60 per cent,” he said in the video.</p> <p>“The alcohols that I see recommended are like isopropyl and also ethanol, but methylated spirits is actually 95 per cent ethanol.”</p> <p>“The alcohol is quite effective against the virus.”</p> <p>Alcohol is effective at killing microbes such as viruses and bacteria as it inactivates their proteins.</p> <p>In the video, Mr Strickling makes the sanitiser out of aloe vera gel so the hands are protected against the stripping alcohol.</p> <p>“Aloe vera will mix with the alcohol and will form a moisture layer gel to protect your skin from the alcohol,” he said.</p> <p>To make the sanitiser yourself, you will need to peel the green skin off the aloe vera plant and put the clear gel into a blender.</p> <p>He then blends the gel until it turns into a foam before mixing it in the methylated spirits.</p> <p>Mr Strickling adds enough so the final mixture has an alcohol content greater than 60 per cent, which is “necessary to break down the envelope protein wall of the virus and destroy it”.</p> <p>He then transfers the solution into a left-over barbecue sauce bottle that he had previously sterilised.</p> <p>Showcasing the sanitiser on his hands, the teacher says “That feels wonderful, that feels very good.”</p> <p>“Now I’ve got my very own virus stopper,” he said.</p> <p><span>NOTE: While even the World Health Organisation offers recommendations for </span><a rel="noopener" href="https://www.who.int/gpsc/5may/Guide_to_Local_Production.pdf" target="_blank">home-made handrub formulations</a><span>, we urge our readers to exercise caution as home-made solutions such as Mr Strickling's can potentially damage the skin if the alcohol is diluted incorrectly. </span></p>

Home & Garden

Placeholder Content Image

Relax with a homemade apricot turnover

<div class="article-body"> <p>Move over apples, it's the season for apricots! This crisp and flaky pastry turnover will bring out the summer flavours you know and love.</p> <p><strong>Time to prepare</strong>: 15 minutes</p> <p><strong>Cooking</strong> <strong>time</strong>: 20 minutes</p> <p><strong>Serves</strong>: 4</p> <p><strong>Ingredients</strong></p> <ul> <li>1 sheet puff pastry, thawed</li> <li>3-4 apricots, sliced and stones removed</li> <li>1 tablespoon arrowroot</li> <li>2 tablespoons sugar</li> <li>1 teaspoon vanilla paste</li> <li>1 tablespoon lemon juice</li> <li>1 tablespoon demerara sugar</li> <li>1 egg, beaten lightly, mixed with 1 tablespoon water</li> <li>Icing sugar for dusting</li> </ul> <p><strong>Directions</strong></p> <ol> <li>Pre heat oven 200°C.</li> <li>In a medium bowl, toss apricot with arrowroot, sugar, vanilla, lemon juice until there are no lumps. Set aside for 10 minutes.</li> <li>Place pastry on a lightly flour surface, cut into 4 squares. Spoon apricots evenly into each square and gently pull one side over to the other, making a triangle.</li> <li>Use a fork to seal edges, brush with egg wash and cut a few slits in the top of each to allow steam to release. Sprinkle with demerara sugar and bake for 20 minutes or until risen and golden.</li> <li>Serve dusted with icing sugar.</li> </ol> <p><em>Recipe courtesy of <a rel="noopener" href="https://summerfruit.com.au/" target="_blank">Summerfruit Australia</a>.</em></p> <p><em>Republished with permission of <a href="https://www.wyza.com.au/recipes/apricot-turnovers-with-sugared-puff-pastry.aspx">Wyza.com.au</a>.</em></p> </div> <div class="social-media-column"> <div class="addthis_sharing_toolbox" data-url="https://www.wyza.com.au/recipes/apricot-turnovers-with-sugared-puff-pastry.aspx" data-title="Apricot turnovers with sugared puff pastry | WYZA" data-description="Move over apples, it's the season for apricots! This crisp and flaky pastry turnover will bring out the summer flavours you know and love -wyza.com.au"> <div id="atstbx3" class="at-share-tbx-element addthis-smartlayers addthis-animated at4-show" aria-labelledby="at-aaa92f9c-c8ff-43fb-b5a7-80605ed5ee32"></div> </div> </div>

Food & Wine

Placeholder Content Image

5 cooking hacks to make life easier in the kitchen

<p>We are sure you would agree that technology continues to change every aspect of how we live our day-to-day lives. In such a time-poor society, maintaining harmony in the family home can sometimes be a logistical nightmare. </p> <p>Of all the rooms in a house, the kitchen is possibly one of the most important and heavily-relied upon rooms. So it's important to have a host of handy appliances to make cooking your daily meals easier and put the joy back into cooking.</p> <p>A visit to your local appliances showroom is an easy way to witness the rapid transition from labour-intensive appliances to models that can now be personalised for individual preferences. Just with ovens alone, choices now include pyrolytic, steam-assist, combi and more, with features that can transform novice cooks into masterchefs.</p> <p>But which oven to choose? If you're in need of a kitchen overhaul, here are 5 useful cooking tips to make your decision and life easier in the kitchen.</p> <p><strong>1. Cooking with steam</strong></p> <p>Enticing meals appeal to the taste buds and stimulate the appetite. So there is nothing more disheartening than witnessing people pushing limp vegetables around, with little desire to actually eat them. It’s true that steamed vegetables aren’t everyone’s favourite, but blaming the vegetables is the wrong approach. ASKO Pure Steam Ovens ensure perfectly steamed vegies every time. Some of the features include:</p> <ul> <li>Stewing, baking and roasting at low temperatures</li> <li>No need for the addition of unhealthy fats and oils</li> <li>Simultaneous cooking of vegetables with meat or fish</li> <li>Blanching, warming and defrosting options</li> <li>Flavour is locked in for crisp, succulent vegetables</li> </ul> <p><strong>2. Hot air combined with steam</strong></p> <p>Steam is the secret ingredient for creating perfect bread crusts and crispy pastries. Hot air combined with steam also allows fish and meat to remain succulent instead of shrivelling up, drying out or burning. Presenting the perfect roast and beautifully browned toppings need no longer be intimidating, with restaurant-quality meals entirely possible in the home kitchen. ASKO smart oven control panels even facilitate personalised settings, recipe saving and automated staged-cooking.</p> <p><img width="500" height="374" src="https://oversixtydev.blob.core.windows.net/media/7268216/asko-5_opt_500x374.jpg" alt="ASKO 5_opt"/></p> <p><strong>3. Roasting solutions</strong></p> <p>Although experienced chefs can manipulate older ovens to achieve their goals, most of us aren’t of that calibre. ASKO Pro Roasting solutions are delivered by the oven in reciprocation with the cook, with innovative features including an automatic heating cycle for hands-free perfection. Simple control panel settings also make roasting easy.</p> <ul> <li><strong>Step 1:</strong> Automated settings deliver high temperatures and hot air to seal in the succulent flavours.</li> <li><strong>Step 2:</strong> Oven settings automatically adjust without the need for personal intervention. The roast continues to cook slowly and evenly using top and bottom heating elements.</li> </ul> <p>In addition, ASKO ovens come with a specialised meat probe. Simply insert the probe into meat ready for roasting. Once the meal is cooked to perfection, the oven control panel will let you know. Impressing family and friends couldn’t be easier.</p> <p><strong>4. Sous vide cooking</strong></p> <p>Vacuum-sealed sous vide cooking is gaining popularity, particularly with people focussed on healthy eating. Your <a href="http://www.asko.com.au/">ASKO</a> oven will do the work for you, so there is no need to be intimidated by this culinary style of cooking. Here are the steps.</p> <ul> <li><strong>Step 1:</strong> Meat, fish or vegetables are placed in a special bag and vacuumed in the ASKO warming drawer. Air is removed and nutrients locked in for juicier, tastier results.</li> <li><strong>Step 2:</strong> Temperature and cook time are automated with sous vide settings. Personal favourites can be accessed via the high definition control panel.</li> <li><strong>Step 3:</strong> Sous vide meals can be maintained at low serving temperatures for several hours for convenient dining. Chefs can join the party instead of slaving away behind the scenes.</li> </ul> <p><strong>5. Self-cleaning appliances</strong></p> <p>Reluctance to cook often stems from the laborious clean-up involved. In addition, it’s impossible to get desired results from an oven that is coated with impossible-to-remove splashes, spills and stains. ASKO solutions include <a href="https://en.wikipedia.org/wiki/Self-cleaning_oven">self-cleaning ovens</a> that do the clean-up while you freshen up, ready to enjoy meal times with family and friends.</p> <p><a href="http://www.asko.com.au/products/kitchen-appliances/ovens/pyrolytic">Self-cleaning oven systems include pyrolytic ovens</a> that reduce grime in the oven cavity to a fine dust. When the cleaning cycle is complete, the dust is simply brushed away. Alternative automatic aqua-clean and steam cleaning systems are also in vogue, allowing you to showcase the fresh appeal and clean lines of contemporary kitchen style at all times.</p>

Home & Garden

Placeholder Content Image

Homemade rose fertiliser

<p>Roses love humus, and soil rich in organic matter will result in healthy plants and generous flowers. Fork in compost, animal manure, shredded and washed seaweed, small dead animals and birds, or a bit of blood and bone – whatever you have access to.</p> <p>If you can get your hands on a bag of lucerne chaff, fork in a cupful around each rose. It works wonders.</p> <p>If you can't easily get organic matter, commercial fertilisers for roses are fine. Follow the maker's instructions and don't be tempted to overfeed. The plant can assimilate only a certain amount and there will be plenty of opportunities for additional feeding through the season. </p> <p>Or you can be adventurous and try the magic recipe given to <em>NZ Gardener's</em> long-time rose columnist Barbara Lea Taylor by an elderly rose nurseryman many years ago, and passed on from one gardener to another ever since due to its almost miraculous effect.</p> <p>You can buy these ingredients at garden centres or big department stores: </p> <ul> <li>3kg sulphate of ammonia </li> <li>1kg iron sulphate</li> <li>2.5kg potash </li> <li>1kg dried blood</li> <li>1kg Epsom salts</li> </ul> <p><strong><span style="text-decoration: underline;">Method:</span></strong></p> <ol> <li>Mix it all up in a wheelbarrow and give each rose about 2 tablespoons forked in and watered around the drip line. Very large bushes and climbers might need more.</li> <li>If you have some left over, it will store well if you keep it in a dry place, and you will need to feed the roses again in December.  </li> <li>If the soil is dry, don't forget to water well after applying fertilisers of any kind. No fertiliser is going to do anything for a rose if it is lying on top of the soil.</li> </ol> <p><em>Republished with permission of <a href="http://www.stuff.co.nz/" target="_blank"><strong><span style="text-decoration: underline;">Stuff.co.nz.</span></strong></a></em></p>

Home & Garden

Placeholder Content Image

Homemade carpet cleaner for pet stains

<p>Keeping carpets stain free can be a challenge when your pets are allowed inside. Katrina from <a href="https://theorganisedhousewife.com.au" target="_blank"><strong><span style="text-decoration: underline;">The Organised Housewife</span></strong></a> has shared her homemade carpet cleaner recipe to rescue your home from unexpected incidents.</p> <p><strong><span style="text-decoration: underline;">Ingredients:</span></strong></p> <ul> <li>Paper towel</li> <li>1 part water and 1 part vinegar in a spray bottle</li> <li>Bicarb soda</li> </ul> <p><strong><span style="text-decoration: underline;">Method:</span></strong></p> <p>1. Use a paper towel to pick up as much solid particles from the mess as you can. If the mess is a solid, vacuum up whatever is remaining. Remove the attachment from your vacuum and use the nozzle to go over the area, left to right, back and forward, several times.</p> <p>2. To remove the odour, sprinkle the mess with bicarb soda and then spray with the vinegar solution. Do not overspray the solution as the bicarb and vinegar will react together. Leave it to sit for 30 minutes to a few hours. The solution will then bring the colour to the surface, making it easy to vacuum away.</p> <p>3. Vacuum up the powder from the carpet and if you can still see a hint of stain, spray again with the vinegar solution and dab a paper towel over the surface to absorb the vinegar. Repeat until the stain is fully removed. Make sure you do not rub the area but only dab/blot it. </p> <p>What are your tricks for removing carpet stains? Let us know in the comments below. </p>

Home & Garden

Placeholder Content Image

The dangers of a DIY will

<p><em><strong>Richard Neave is a partner specialising in commercial, property and trust law, at Duncan Cotterill.</strong></em></p> <p>DIY wills are becoming increasingly popular as a quick, cheap option to put a will in place, but care is required. The legal and financial risks to your executors and your loved ones could be major.</p> <p>A homemade will, or an online will (both examples of DIY wills), may look like the faster, cheaper, option when compared with finding the time to go and meet with your lawyer, but there are numerous risks.</p> <p>For example, your will may not comply with the <a href="http://www.oversixty.com.au/finance/legal/2014/11/why-you-need-to-appoint-a-power-of-attorney-now/" target="_blank"><strong><span style="text-decoration: underline;">legal formalities required for a will</span></strong></a>, or it may contain drafting errors or omissions which result in unintended consequences. All of these could end up costing your executors thousands of dollars to rectify.</p> <p>If your estate is modest, this will further diminish the value of your estate, which means less for the beneficiaries under your will.</p> <p>The courts are seeing an increased number of wills that have been generated from online websites. Many of these are deficient in a number of respects and cost significantly more to fix than to get right in the first place.</p> <p>For example, in completing the will, the DIYer may omit to input the names of their intended beneficiaries into the correct part of the will.</p> <p>Some DIY wills follow a 'fill in the gaps' format, but they are not so easy to follow. Sometimes the person completing the will omits this information by accident or innocently believes that if they have already referred to the person in another part of their will, for example named them as the executor in their will, then that also covers reference to them as the beneficiary of their will.</p> <p>Sadly, it does not, and in this scenario, a partial intestacy will result. <a href="http://www.oversixty.com.au/finance/legal/2016/12/why-you-need-to-update-your-will/" target="_blank"><strong><span style="text-decoration: underline;">If you have not named a beneficiary</span></strong></a> in relation to a gift in your will, the beneficiary you intended to leave that gift to will miss out in favour of those entitled under the Administration Act 1969 which deals with those who receive under intestate estates.</p> <p>It is possible that if you have left written instructions as to how you intended to dispose of your estate or you have told a family member or close friend who you have benefited under your DIY will, then the written instructions may be used as evidence or the person you told may be able to give evidence after your death.</p> <p>Your executors could also look at applying to the High Court to correct the will. They would of course need to have sufficient evidence to establish what you intended.</p> <p>Again, this will be an expensive and time-consuming process, especially if other affected parties choose to challenge your application and obtain their own legal advice, resulting in a full court hearing.</p> <p>It will also delay the <a href="http://www.oversixty.com.au/finance/legal/2017/03/why-housing-affordability-could-be-the-biggest-issue-facing-seniors/" target="_blank"><strong><span style="text-decoration: underline;">administration of your estate</span> </strong></a>and may cause unnecessary stress to your family and loved ones who may end up financially worse off, or with nothing at all. It is very easy for this to happen.</p> <p>Before you sign your DIY will, you must read each clause carefully. If you are in any doubt, ask for assistance.</p> <p>It's certainly important to have a will and we encourage people to make wills. However, there is peace of mind in knowing that your will is legally valid, that the original is held in safe custody, and that the people you intend to benefit will actually benefit</p> <p>A will should also be reviewed every five years, or earlier, on the happening of major life events such as getting married, buying a home, having children or the death of a loved one. There are numerous benefits in consulting with a lawyer.</p> <p>A good lawyer will take the time to talk to you about your family and your relationships, to understand your estate planning goals, your assets and liabilities and also talk to you about any risks such as claims that could be made against your estate and how you can best minimise or deal with these in your lifetime.</p> <p>Have you ever considered a DIY Will?</p> <p><em>Written by Richard Neave. First appeared on <a href="http://www.stuff.co.nz/" target="_blank"><strong><span style="text-decoration: underline;">Stuff.co.nz</span></strong></a>.</em></p> <p><em>Any advice contained in this communication is general advice only. None of the information provided is, or should be considered to be, personal financial advice.</em></p>

Legal

Placeholder Content Image

Parents design homemade wheelchair for paralysed toddler

<p>To say Evelyn Moore has been through the wars would be an understatement. At just four months Evelyn was diagnosed with a spinal tumour that required urgent attention.</p> <p>But eight intensive rounds of chemotherapy took their toll on Evelyn’s young body and left her paralysed from the arms down. Her parents had been so preoccupied with the treatments they couldn’t get enough insurance to cover the cost of the wheelchair.</p> <p>But Evelyn’s mother Kim wasn’t going to give up that easy.</p> <p>After researching options online, Kim came across a do-it-yourself wheelchair for babies on Pinterest and asked her handyman husband Brad, if he could make it.</p> <p>It cost about $100 to make, but it did the trick and now at 13 months Evelyn is skilfully moving it around the home. She’s got such a gorgeous smile, it’s a terrible shame to think that she’s been through so much pain in her young life.</p> <p>But we’re sure with Evelyn’s fighting spirit and her parent’s ingenuity, she will be able to pull through. Leave any messages of support in the comments.</p> <p><em>Video credit: YouTube / The Canadian Press</em></p> <p><strong>Related links:</strong></p> <p><span style="text-decoration: underline;"><em><a href="/health/caring/2016/08/wheelchair-allows-terminally-ill-patients-to-go-to-beach/"><strong>Smart wheelchair enables terminally ill patients to visit beach</strong></a></em></span></p> <p><span style="text-decoration: underline;"><em><a href="/travel/travel-tips/2016/06/disabled-travel-blogger-anthony-tipling-bower/"><strong>Travel blogger aims to set ‘wheel’ in every country</strong></a></em></span></p> <p><span style="text-decoration: underline;"><em><a href="/travel/travel-tips/2016/08/managing-mobility-limitations-on-extended-trips/"><strong>Managing mobility limitations on extended trips</strong></a></em></span></p>

News

Placeholder Content Image

How to make candles

<p>If you’ve been hankering after a winter project to keep you busy during the longer, colder nights, candle making might just fit the bill. Much easier to make than you’d expect, DIY candles make a great craft project that results in an array of beautiful mood lighting for your home. You’ll also be flush with gifts for friends and loved ones once you really get into the swing of all things wax.</p> <p><strong><span style="text-decoration: underline;">You will need:</span></strong></p> <ul> <li>Wax</li> <li>Beeswax</li> <li>Hardener</li> <li>Wicks</li> <li>Metal wick holders (from craft stores such as Riot art and craft or spotlight or can be found online)</li> <li>Candy thermometer</li> <li>Old saucepan</li> <li>Tray</li> <li>Foil</li> <li>Candle holders (old jars and other containers are ideal)</li> <li>Dye, essential oil for scenting, optional</li> </ul> <p><strong><span style="text-decoration: underline;">How to:</span></strong></p> <ol> <li>Place wax into a large saucepan over low heat. Your saucepan will become quite encrusted with wax so choose one that you don’t mind dedicating to candle making.</li> <li>Don’t allow wax temperature to exceed 90ºC or to smoke. Use a candy thermometer to continuously check wax temperature.</li> <li>Melt the hardener and beeswax (use 1 part of each to 10 parts wax) in a separate saucepan.</li> <li>Add beeswax mixture to melted wax.</li> <li>Add dye if using.</li> <li>Remove wax from heat.</li> <li>To add a scent, stir in about 40 drops of oil-based essence (the exact amount will depend on the intensity of the scent and your own preference).</li> <li>Place wick into a metal wick holder and use small metal pliers to clamp closed to secure.</li> <li>Place in base of your chosen candleholder. Alternatively you can use a small amount of melted wax to secure wick in centre of your candleholder. To centre wick in a votive, tie wick around a pencil or skewer and place across the top so it is taut.</li> <li>Place candleholders on to a foil-covered tray. Pour melted wax into candleholders, stopping 2-3cm from the top.</li> <li>Set aside to harden. If there are any spills or leaks, place candleholder in cold water and allow to cool. Once cooled, remove from water. Add a small amount of wax if the candle has fallen slightly in the centre.</li> <li>Trim wick to 6mm and enjoy!</li> </ol> <p><strong>Related links:</strong></p> <p><a href="/lifestyle/home-garden/2016/06/can-your-house-be-too-clean/"><em><strong><span style="text-decoration: underline;">Is it possible for your house to be too clean?</span></strong></em></a></p> <p><a href="/lifestyle/home-garden/2016/05/toxic-items-in-your-home/"><em><strong><span style="text-decoration: underline;">10 toxic items in your home that might surprise you</span></strong></em></a></p> <p><a href="/lifestyle/home-garden/2016/05/tips-for-maintaining-wooden-floors/"><em><strong><span style="text-decoration: underline;">4 commandments of looking after wooden floors</span></strong></em></a></p>

Home & Garden

Our Partners